Making of the kitchen with Sketchup
Irmin Verstappen - Interieur architectuur & 3D visualisatie
To start of I would like to say that only way to get a very good result is to make your overall model as detailed and realistic as possible. Also in the 3D warehouse you can find some very good objects to import in your model, and if you search a little you will find some nice 3ds files of a lot of furniture, especially design furniture (chairs, sofas, …). I also have uploaded some furniture to the 3d warehouse, such as the Eames chairs I used in this model.
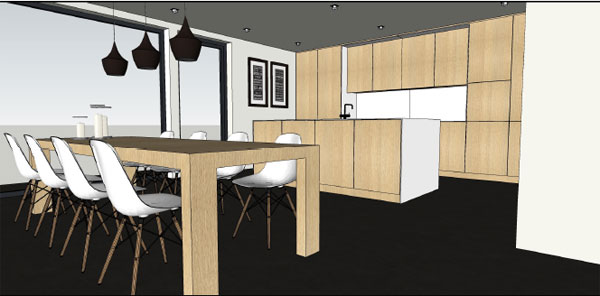
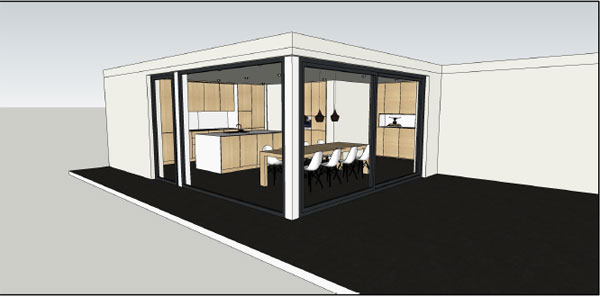
This model is drawn very symmetrical, so this makes the drawing time a lot shorter if you model wisely. Make sure you put everything in components, copy and invert them to get a fast result. I try to make as much components a possible, which makes it also easier to make changes afterwards, or attach materials to it.
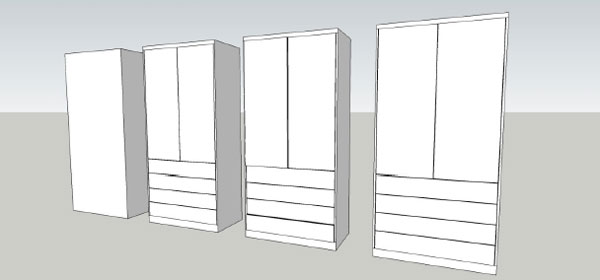
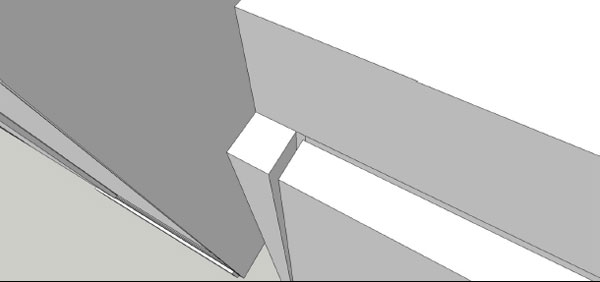
When I draw a cabinet I start with a volume and on top of the front face I make the outline of the doors and for example the drawers. Then I move + copy each different rectangle 2mm in front of this surface, so that they are no longer attached the first volume. When they are copied, I use the push/pull tool to make the 18mm thick. I now make a component of each different rectangle (door and drawer) and copy them if necessary. Also don’t forget to make a component of the first volume at this stage.
A. Materials:
If you are new to Vray I suggest that you take a look at the way some materials are made, their reflection (an important part of Vray), bump and displacement maps. There are some great tutorials out there and one of my favorite websites is the blog of the great Nomeradona (sketchupvrayresources.blogspot.com). I spent hours trying his tutorials, a huge help!
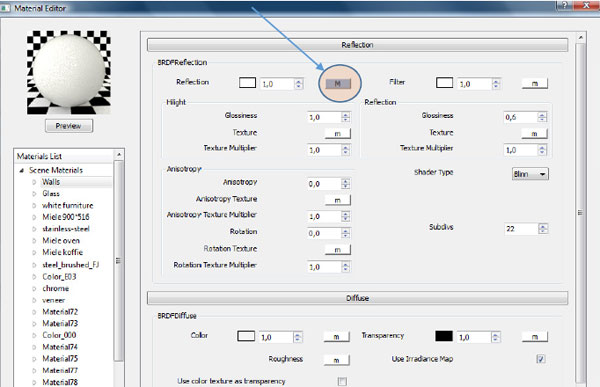
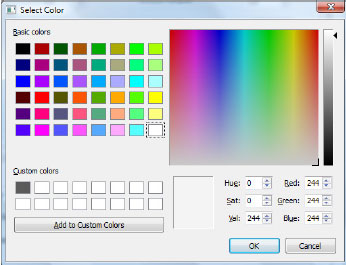
1. Wall color - To help your interior render look brighter it helps to make your walls reflect a little. I used white as my base color, but it works with any color. And you will notice that the white has a tiny bit of grey to it… I always use ‘tex fresnel’ as my reflection.
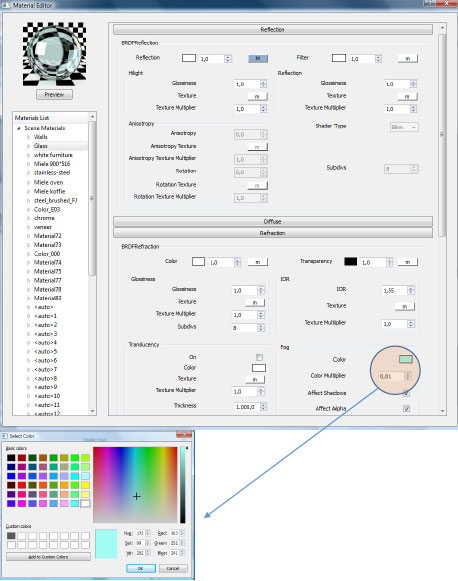
2. Glass - I start off with a basic glass, which you can find on the net, but I add a little fog color to it. To make it look more realistic. (btw there is a great glass tutorial on Nomeradona’s blog)
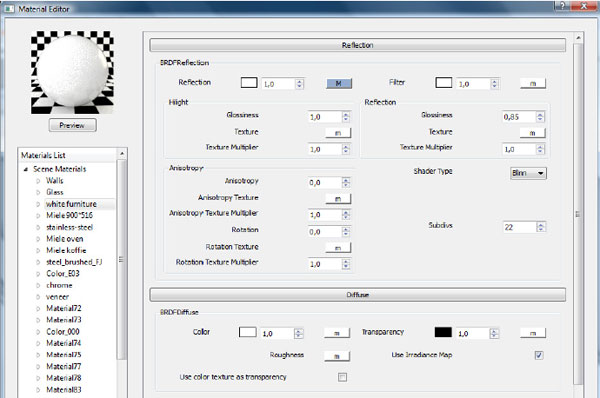
3. White furniture color - For the white counter tops I used little bit of shine. It should resemble composite stone…
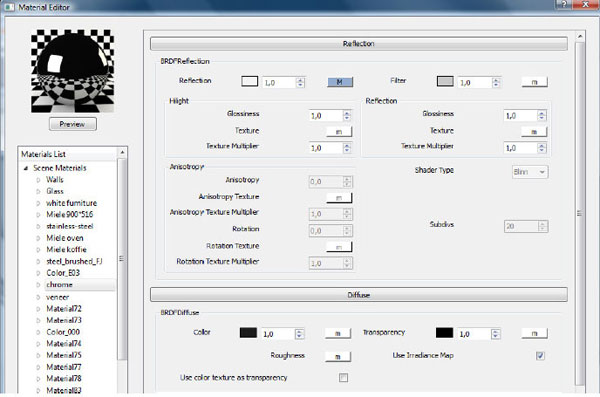
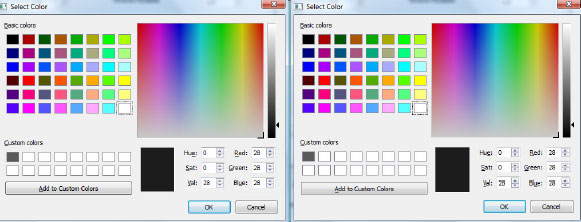
4. Chrome - Chrome is a material that I often use, and until recently I experimented a little bit with the reflection filter and the diffuse color, made it a little bit more grey. Otherwise it would look like a mirror. You have to add the texfresnel to the reflection layer.
The diffuse color
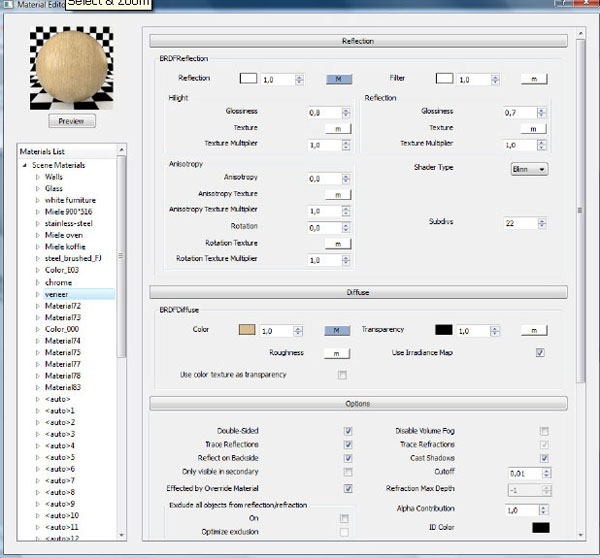
5. Veneer - There are some nice textures to be found, but always look for seamless onces, and try to figure out the correct scale. Also, veneer has some reflection, don’t forget! And when you have a render taken in close up, you can add a little bit of bump.
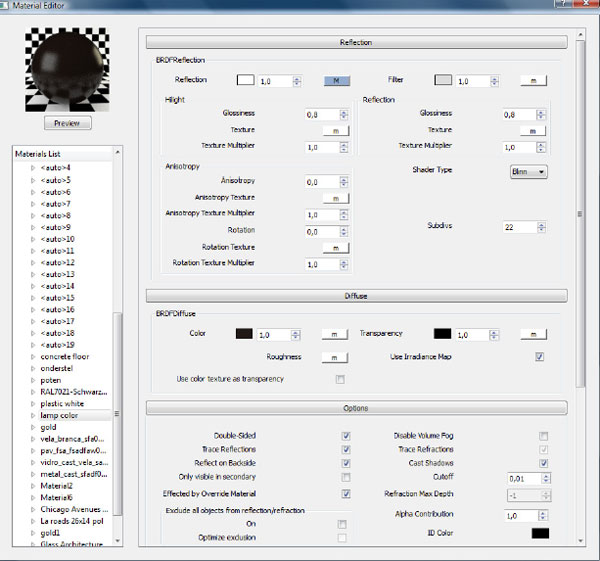
6. Lamp color (black aluminium, gold on the inside) - I used a dark grey for this, relection filter also a little bit of grey, and bit of glossiness.
All the other materials were found on the internet, and I didn’t change a thing to them!
B. The settings
As you know, there are many good settings for interior renders to be found on the net, but for me I find the best results are when I render my models with an HDRI as lightsource.
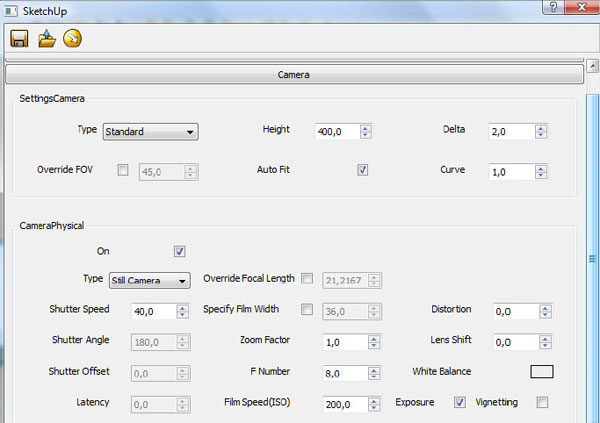
So I start of with the camera settings, I lower the shutter speed to a value between 30 and 50 to brighten up the picture, and also increase the film speed to somewhere between 175 and 225. In this scene, there are a lot of windows, so there a lot of daylight in the scene.
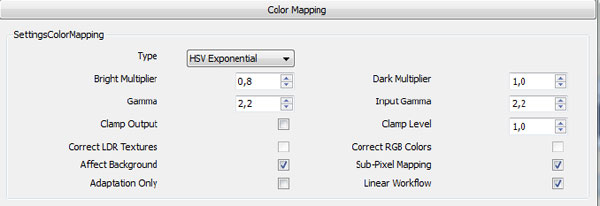
As I mentioned, I try to create a more realistic render with the help of an HDRI picture. You will have to experiment a little with the multiplier. In this scene I increased it to 10, that way I wouldn’t have to bring in extra lights into the model. Also use the same HDRI as a background. Make sure to set the HDRI as an environment
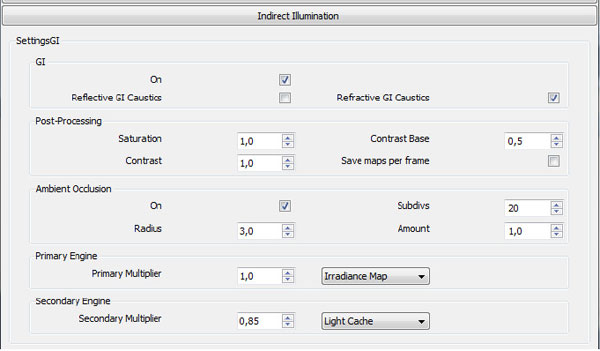
Make sure to activate the ambient occlusion, that way you will get nice clean corners. The more subdivs, the better the result. My primary engine remains the ‘Irradiance map’, the second is the ‘Light cache' ...
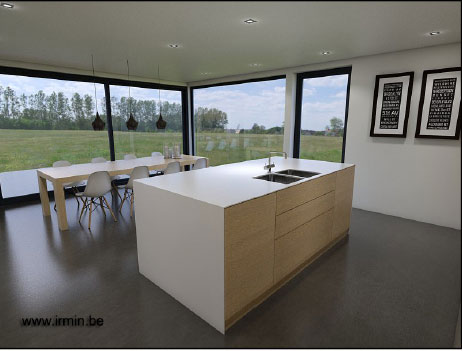
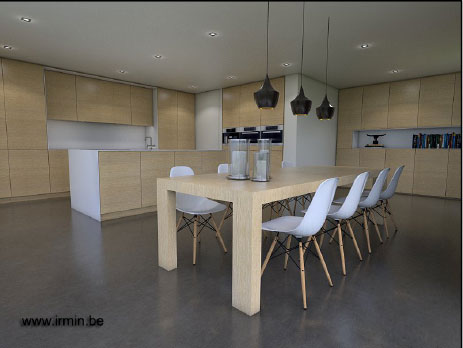
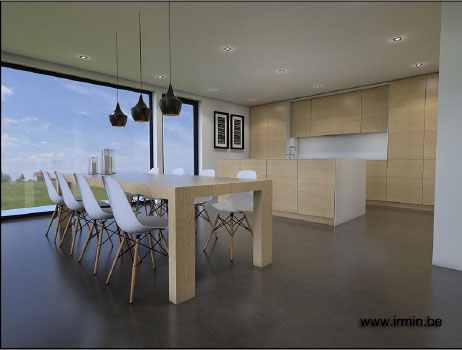
C. The result, without post- processing in photoshop
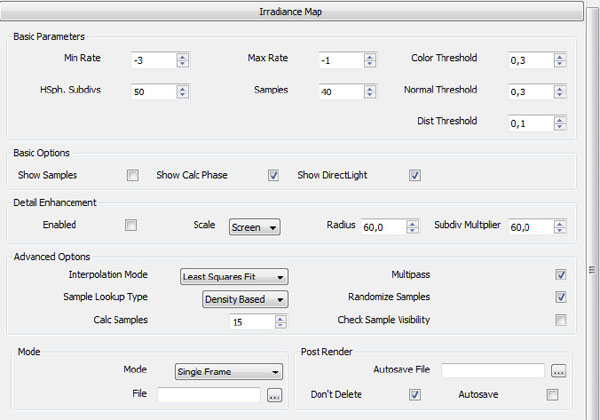
The settings for the irradiance map.
The only thing I changed are the samples, I increased them to 40.
The light cache settings:
The higher the value of the subdivs, the better you result, but it will have a direct impact on your render time. So, make sure you adjust it to your needs...
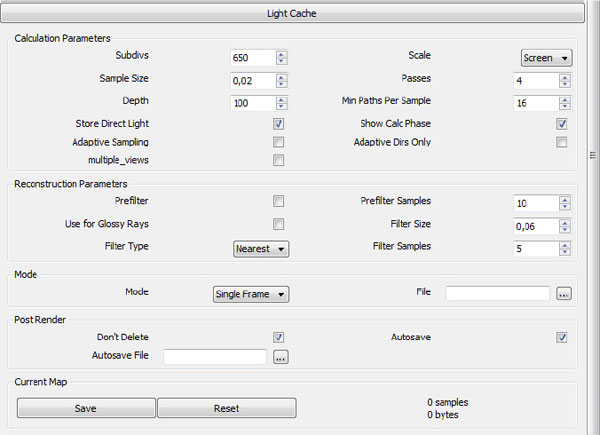
The rest of the settings weren’t changed, and are the same as the SU_default visopt.
C. The result, without post- processing in photoshop
Email: irmin@irmin.be
Website: www.irmin.be
- Profile Builder (Pro)
- Sketchup vray tutorials
- SteelSketch for sketchup
- 3d Sketchup Render Section
- 2015 Click-Change Plugin
- V-Ray 2.0 for Sketchup
- 3d sketchup components of plants
- Revizto 3.0 for Sketchup
- Modelur for sketchup
- Animation in Sketchup
- Sketchup parametric urban design
- SimLab 3D PDF exporter 3.1
- Sketchup full frame wood 2.0
- Easysketch Sketchup Plugin
- Instant Roof Nui Plugin
- Scene Generator Plugin
- Maxwell Render Suite 3
- SketchUp Instant Wall Plugin
- LightUp version 3.3
- Curtain Wall Plugin
- Instant Fence and Railing Plugin
- Plug-in Raylectron v3
- SimLab SketchUp exporter
- Tilelook Sketchp Plugin
- Solar Energy Design Plugin
- IES VE SketchUp plugin
- DropGC plugin for Sketchup
- Vue Exporter Plugin V10.0
- MoveAlong 1.0 for SketchUp
- [Re]Scene plugin
- 3D Tree Maker v1.10.07
- LightUp for SketchUp
- Advanced Camera Tools for SketchUp
- TIG-PointUp Plugin
- Outdoor-stair Plugin
- CutNFill Plugin for Sketchup
- [SU]Ch plugin for sketchup


